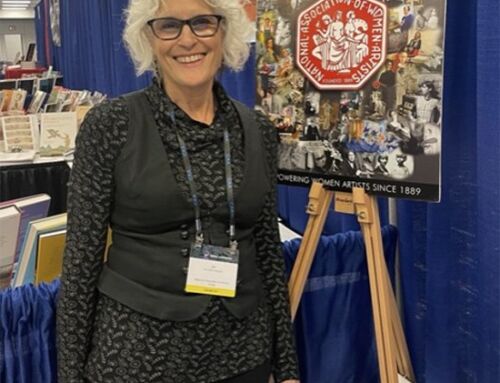
Carolyn Rogers
Tools of the Trade: “Printing Platinum/Palladium Images in My Kitchen”
by Carolyn Rogers
Early in my art career, I viewed a group exhibit at the Smithsonian American Art Museum, and I was enthralled by the beauty and strong photographic images of Brett Weston. In my studies at the Corcoran School of Art, I concentrated on Black & White photography, spending years in the traditional darkroom, printing gelatin silver prints.
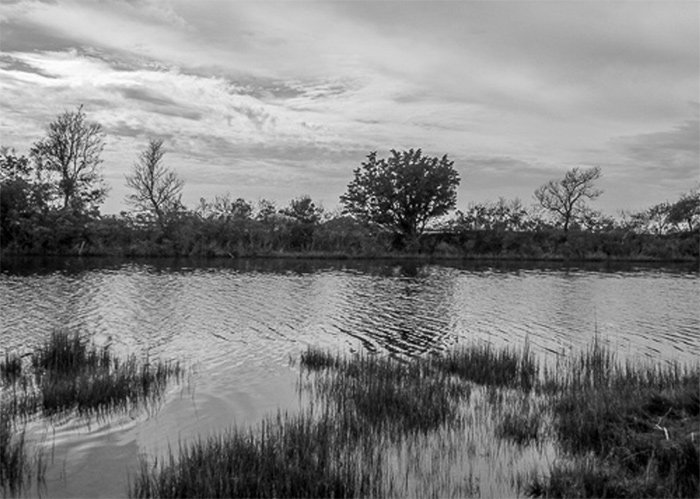
Canal Dreaming, platinum/palladium photograph
Another influence on my artistic development was Alfred Stieglitz, who used the platinum/palladium process; he was also a strong advocate for promoting photography as a fine art. I learned the platinum/palladium process in a workshop at the Center for Photography at Woodstock (formerly located in Woodstock, NY, now in Kingston, NY). The workshop was taught by Craig Barber, a master of the process. I have been working in this process ever since.
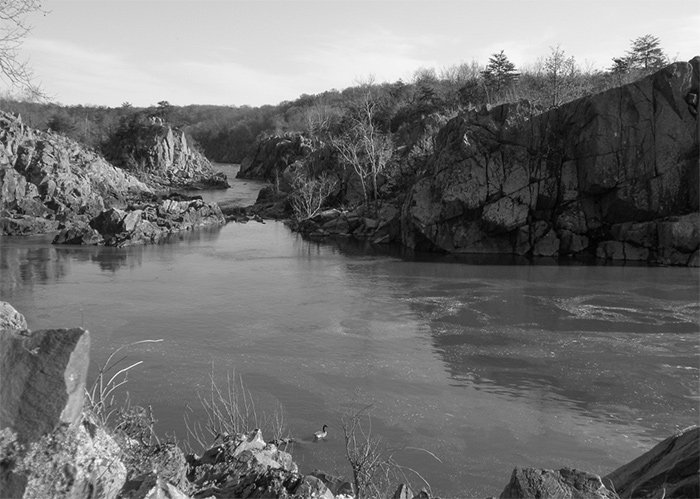
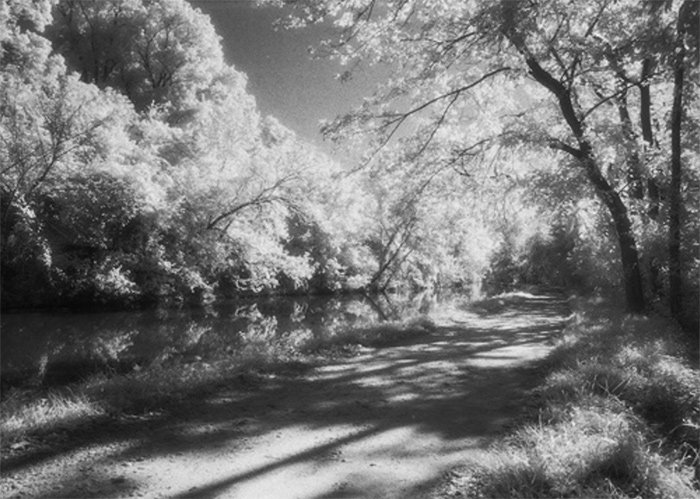
Calm Waters, platinum/palladium photograph
In my artwork, I capture the simple beauty in everyday life, the commonplace or ordinary scenes in the natural and built environment. I use water and light as beautiful threads that draw the eye in; the quality of light is of paramount importance, defining the textures and forms in nature, and patterns of light and shadow.
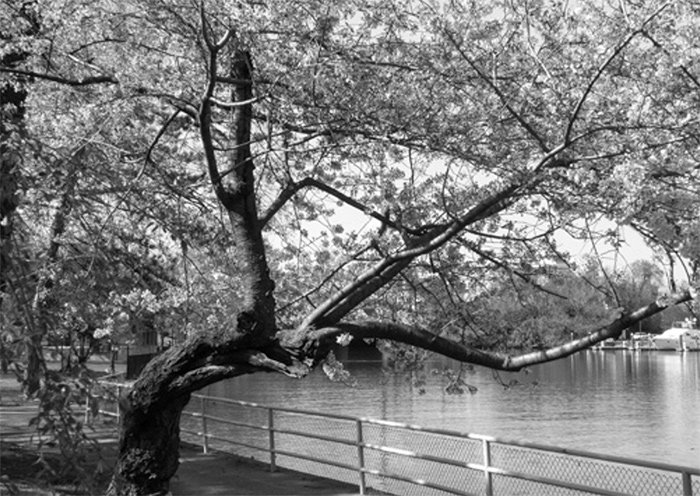
West Patomac Park, platinum/palladium photograph
I use the platinum/palladium printing process to capture a softer, painterly effect, evoking late 19th century idyllic landscapes, lending a poetic quality to the images. The platinum/palladium process, a time-honored process, renders a rich tonal scale, incredible depth and detail in the shadows, and permanence to the images. The mixing of a 19th/early 20th century printing process with modern day images creates an appealing tension in the images. The process is time-intensive, and each image is a unique hand-made vintage quality print.
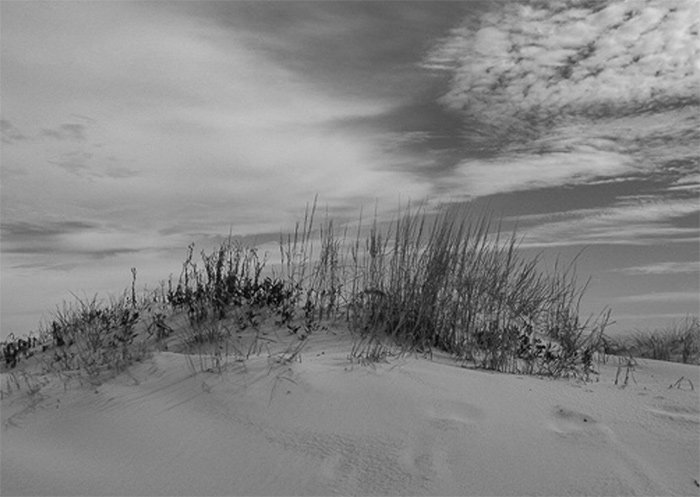
Sky Patterns, platinum/palladium photographs
A Brief History of Platinum/Palladium Photography
A German chemist and physicist – Heinrich Gustav Magnus (1802-70) – is credited with the first known preparation of platinum chloride. In 1828, he discovered the first of the metal complex platino-ammonia compounds. This modern compound, potassium chloroplatinate or potassium tetrachloroplatinate, is essential to the success of the platinum/palladium process, as its reduction to a metallic state is a simple one of platinum chloride and ferrous oxalate leading to black platinum tones.
In 1831, Johann Wolfgang Dubereiner (1780-1849) observed the decomposition of ferric oxalate upon exposure to UV light and scientifically calibrated its sensitivity. That same year, Sir John Herschel noticed that when a platinum solution was neutralized in aqua regia with calcium hydroxide and then placed in a dark environment, nothing happened; however, when exposed to sunlight, a precipitate formed.
Others experimented with the chemistry, including Robert Hunt (1807-87) who conducted experiments in the early 1840s using platinum chloride on silver iodide coated papers. In 1858, C.J. Burnett was the first to demonstrate a semi-controlled adaptation of these previous experiments using sodium chloroplatinate.
In 1872, William Willis (1841-1923) conducted an involved series of experiments using potassium chloroplatinate and ferric oxalate, seeking a way to make a photographic print that was both stable and user-friendly. He was granted several patents between 1873 and 1887 for his discoveries and successfully launched the first commercial platinum paper enterprise.
Peter Henry Emerson (1856-1936), an English physician, was the first scientist to officially adopt the subjective side of image making, using the platinum /palladium process. His was the pictorialist vision where a photograph always aspires to represent an artist’s true aesthetic vision.
While Louis Daguerre (1787-1851) is credited with inventing the daguerrotype process in 1839, experimentation with the platinum/palladium process was already well underway.
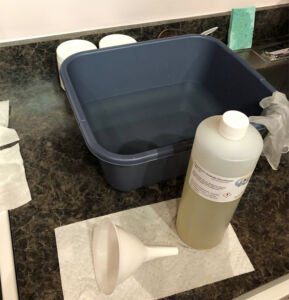 Materials Needed:
Negatives: platinum/palladium images are contact printed, where the negative is the size of the desired print. Negatives should be at least 2 1/4 inches. My negatives are either 4 x 5 or 5 x 7 inches, taken with either a pinhole camera or a digital camera.
Watercolor paper: 100 percent rag paper, with a pH of 5.5-7.5. I’ve used Hahnemuhle, Arches, and Revere papers.
Coating brushes: foam paint brush or Hake, but no metal brushes.
Use distilled water to prepare the paper.
Always use latex gloves in handling the chemistry.
Printing studio: subdued light is acceptable and will not fog the print. I print in my kitchen.
Procedure/Steps
1) Place printing paper on a coating surface and pencil in registration marks about 1/4 to 1/2 larger than the size of the negative (image).
2) Mixing the emulsion: Combine drops from 2 solutions of ferric oxalate (one with a small amount of potassium chlorate as a contrast agent) with the metal salts (platinum and palladium). The quantity of drops from each of the 4 solutions is determined by the size and density of the negative as well as the desired contrast of the print. Mix the solution (emulsion) in a shot glass.
Note: Ferric oxalate is light sensitive and toxic; avoid breathing, touching or injecting the chemical. Use latex gloves, eye protection and a mask. The shelf life of ferric oxalate is 6 weeks to 6 months. Na2 (sodium chloroplatinate) is a contrast agent in standard platinum/palladium printing; it increases contrast without graininess and mottling. It can replace one of the ferric oxalate solutions.
In mixing the various solutions, you can control the print’s contrast. Platinum renders a cold (black) tone, and palladium a warm (brown) tone. By adding small amounts of platinum to the palladium solution, the color of the print will move toward a cooler tone.
3) Coat the paper by pouring the sensitizing solution (emulsion) in the paper center and spreading the liquid with gentle brush strokes, spreading as rapidly and evenly as possible. Use light strokes and be careful not to abrade the paper. Wash the brush thoroughly before using it again.
4) Allow the emulsion to soak into the paper for 5-10 minutes. Hang the paper to dry in a dark place and let the emulsion-soaked paper dry overnight. Make sure paper is completely dry before making exposures.
5) Exposure: Place the negative on top of the coated paper and cover with a piece of 1/4” plate glass. Contact printing frames will hold the negative tightly in place. The paper is then exposed to direct sunlight, with the length of exposures determined by the density of the negative and strength of the sun.
6) Expose the paper to sunlight or suntan-like mercury vapor lamp or UV fluorescent bulbs. The platinum/palladium printing process responds only to the UV light spectrum; print using either the sun or non-coated fluorescent bulbs. Sunlight works best. Dense negatives need longer exposure times. For an average negative, a 3-7-minute exposure in the summer sun is typical. Use open shade for contrast – a longer exposure time out of direct sunlight will increase contrast in a non-chemical way. An image can be clearly seen prior to development.
7) Development: After exposure, develop the print immediately, using ammonium citrate developer or potassium oxalate developer. Do not use metal trays for developing, as this will adversely affect the print. Pour developer quickly over the print, pouring rapidly enough to break any air bells from forming on the surface. Pour while at the same time tilting and sloshing contents of the tray over the print (emulsion side up). The print develops immediately; development is complete within a few seconds. Development time is 90 seconds. Ammonium citrate can be saved and used repeatedly, improving with age – the color will darken due to the accumulation of dissolved metal.
8) Rinse gently with clear water for 2 minutes.
9) Clearing: Tetrasodium EDTA (ethylene diaminetetra acedic acid) salt is used as a clearing agent; it dissolves the ferric oxalate and removes its yellow cast. Use trays of EDTA clearing agent, with gentle agitation for 5 minutes in each bath. Fresh clearing agent will clear up to 12 8×10 prints. EDTA is safer than hydrochloric acid which is quite dangerous. To reduce clearing time, use sodium sulfite with EDTA.
10) Finishing. Thoroughly wash the prints and leave them to dry. Final washing should be done with gentle flow of water for approximately 30 minutes.
Reminder: Use gloves throughout the process and patience – this is a slow and exacting process.
After being juried into several exhibits at the National Association of Women Artists (NAWA), I was accepted as a new member in 2018 and continue to exhibit with NAWA. I have exhibited widely and began showing my work in juried exhibits in 1997, with my first solo exhibit at the Arts Club of Washington in 1999, selected by Neal Benezra, former curator of the Hirshhorn Museum. Since then, I have been selected for seven solo exhibits and numerous juried group shows in Washington, D.C. and New York City. I recently exhibited 36 platinum/palladium works in a solo exhibit at the Arts Club of Washington, DC, selected by Erich Keel, an independent curator/educator (formerly with the Kreeger Museum).
Whispers, platinum/palladium photograph
Please visit my website for more images and information:
https://carolyncrogers.weebly.com/